We haven’t decorated for Christmas since 2012. Which doesn’t seem that long ago, but it does mean we spent one whole holiday season without a smidgen of Christmas decorations up anywhere. We didn’t decorate last Christmas because we were moving out of our home on the 28th of December, and before that we had started moving things here and there in preparation for the Big Moving Day. At the time, it didn’t seem worth it to unpack Christmas only to pack it up again so quickly.
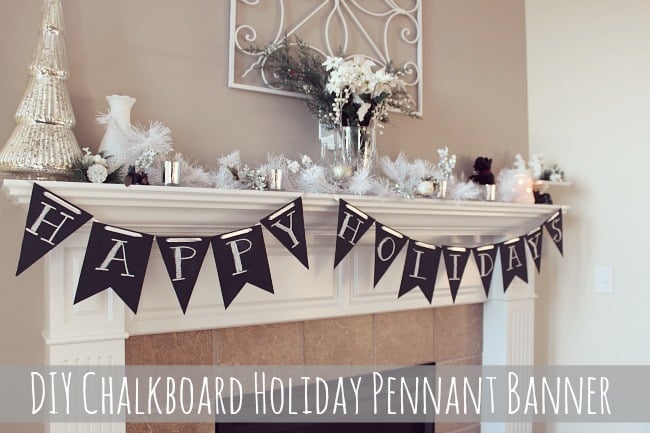
So, when I pulled out all the red and green bins this year, they were extra special. What made them even more special was this marks the first holiday we get to decorate our new home – a home that has a fireplace mantle.
Oh, the possibilities of mantle decorating! And for the holidays! I knew right away that I wanted to do some kind of banner or garland. Funnily enough, I was originally set on doing something with pinecones but then I got stuck on the idea of chalkboards for some reason, which is not even remotely related to pinecones. I started brainstorming what kind of banner I could make using chalkboards and I came up with this fun pennant banner that I’m calling “holiday,” but because it’s chalkboards, it can be for whatever you’d like it to be!

Supplies
- Scrap paper
- Mat board (the type used in framing) or something similar
- Scissors and Exacto Knife
- Hole punch
- Pencil
- Chalkboard paint
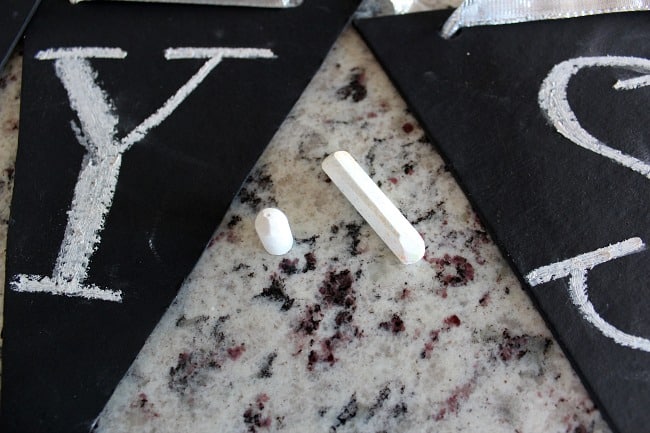
- Chalk
- Ribbon
Steps
Step 1. Using the scrap paper (or excess mat board, which is what I did), make a template for yourself of the shape you’d like repeated in your banner. I did triangles (7″ sides and 5.5″ top) and another shape that I don’t know the name of, but it’s a square with an inverted triangle base (I ended up only making four of that shape because cutting them out was more challenging).
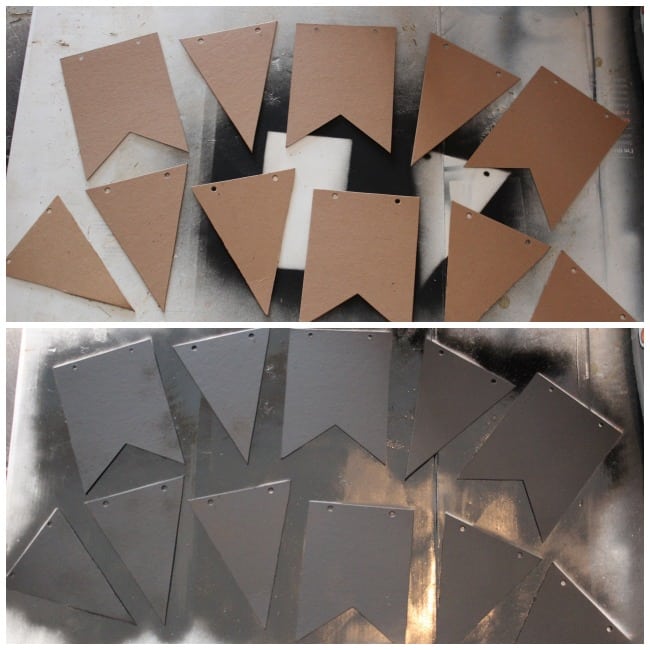
Step 2. Trace the template on your mat board (or whatever material you chose), then cut out the pieces. For my banner, I spelled “Happy Holidays” so I needed 13 pieces. I actually have a mat board cutter, so I used that to cut the mat board down into smaller pieces before tracing. I used the scissors to cut out the shapes after I had traced, for greater precision.
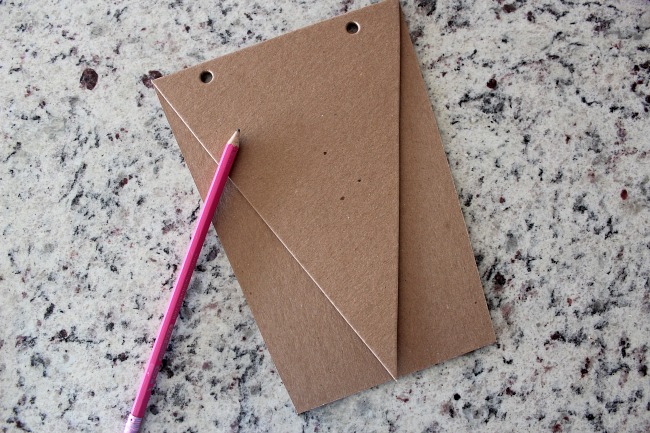
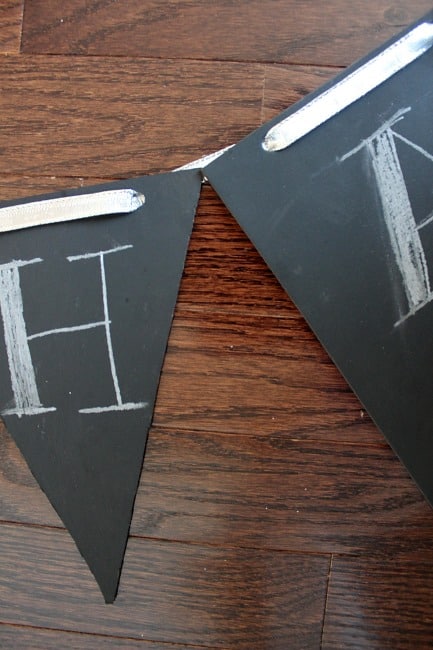
Step 3. Next, you’ll need the hole punch. In the image above, you can see that I hole punched my template ahead of time. Go ahead and do the same to your template, because then you can trace the holes onto each banner piece rather than measuring each individual piece. I decided to go with two holes so I wouldn’t have to knot any ribbon when it came to hanging the banner (having a piece of material flat across the front will stabilize the triangles). I have about 3″ between each hole; I eyeballed it until things looked right. Also, note that it’s a little challenging to hole punch mat board, especially if it’s thicker. I used the exacto knife for this step, to get things started and to clean up any rough edges on the inside of the hole.
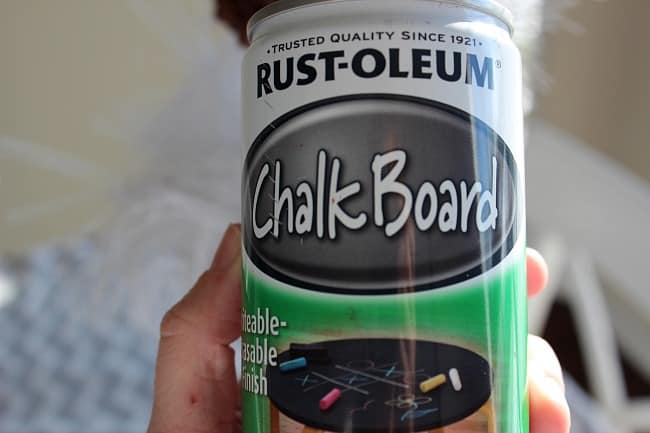
Step 4. Grab your spray paint and arrange your banner pieces on some scrap paper or cardboard. It’s a little chilly here, so I did my spray painting in the garage with the door open. I used Rustoleum spray paint, which I have used in the past when I turned a broken mirror into a chalkboard – it’s a really great chalkboard paint. The key to spray painting is short, even strokes at approximately 8-10″ away from the surface you’re painting. I put on two coats, just to be safe. I tested out my template before spray painting all of the pieces, just to make sure the paint worked well on mat board, hence the triangle shape already on my scrap cardboard!
Step 5. After each piece was dried, I started experimenting with chalk. I had picked up a chalk pen at a craft store, so I used that initially to get all the letters on each piece. But, I wasn’t 100% happy with how dull the white ended up looking, so I went over each letter with regular chalk that I wet down. If you wet down chalk before using, you get a more vibrant color out of it when it dries. I did not “prime” the spray painted pieces, as the can of paint recommends, because I wanted to keep the crisp black background against the white lettering. I decided to do a serif font with the lettering, and I love the way it turned out.
Step 6. Lastly, I wove the ribbon from the back of each piece to the front, to get a flat piece of ribbon along the top (to stabilize the piece). I had some silver ribbon on hand and I used the entire roll for this project; the amount of ribbon you’ll need depends on how many letters you’ve got on your banner. I chose to hang “Happy” and “Holidays” on two separate pieces of ribbon, just in case I wanted to stack one on top of the other (which I didn’t end up doing, but I was still glad they were separated). I also made sure the corners of each piece were touching, and I think that further helped with stabilizing the whole thing.
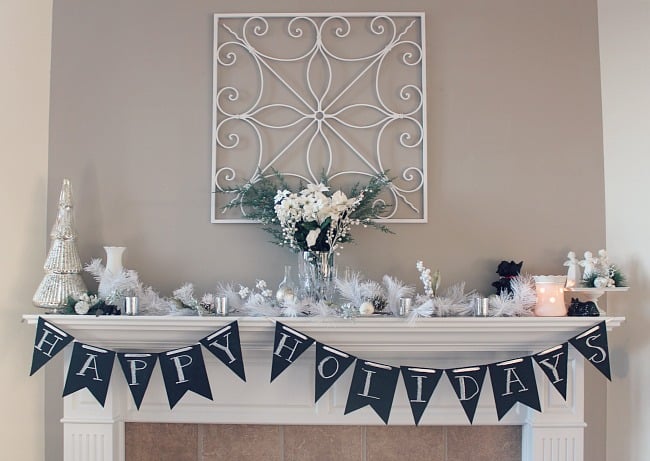
Step 7. Hang your banner! Voila – you have a lovely, customizable banner that you can use for any holiday going forward, since it’s chalk and you can just erase and start again! I used scotch tape to affix the banner to my mantle and, so far, it’s getting the job done.
Do you have any DIY projects up your sleeves for the season?