This shop has been compensated by Collective Bias, Inc. and its advertiser. All opinions are mine alone. #ProjectAmazing #CollectiveBias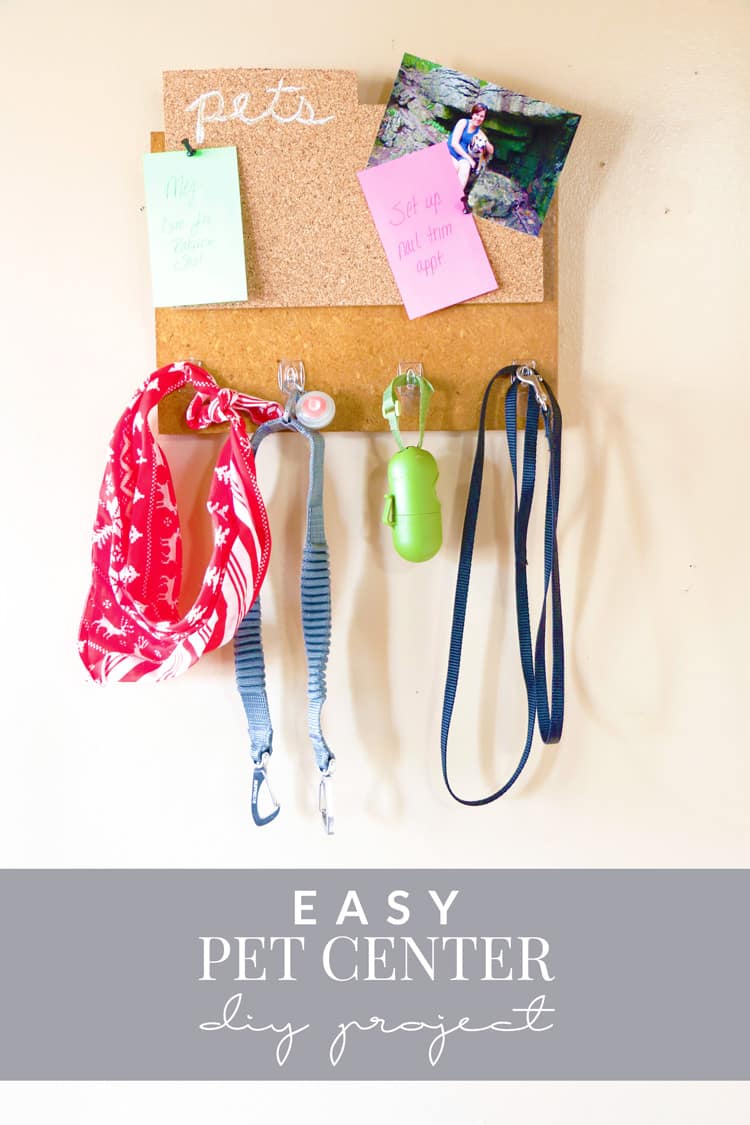 This year is all about organization in our house. I’m not a neat freak (I’m way too messy to be one myself), but I do like an organized house. Even if the organization is found in the mess. ;)
For me, that means things need to have a place (like how I talked about getting organized in ways to make your daily routine healthier.) If things have a home, it’s so much easier to spend a couple of minutes picking up instead of just moving things from room to room.
And that’s especially true for our pet stuff. We have a lot of it since we treat them like our kids so we’ve been working really hard to get it organized in central locations. This way, when we want to go for a walk, we have everything in one spot. Or when we head out for a road trip, it’s all together already.
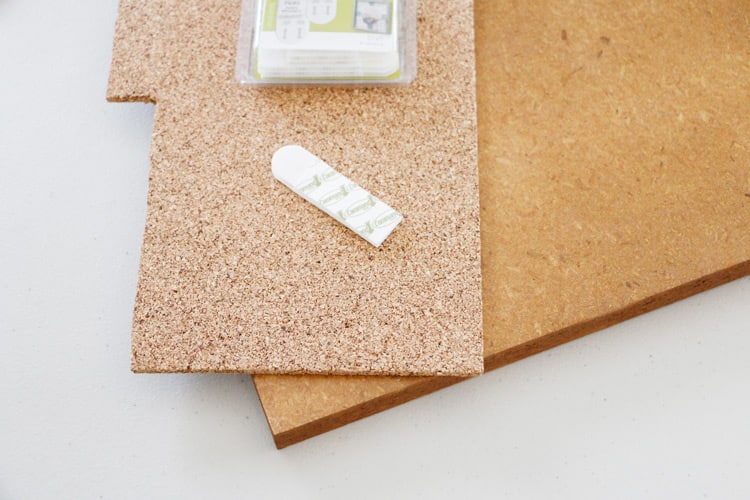
This Pet Center DIY helps tremendously with that so I figured I’d share the project with you, too!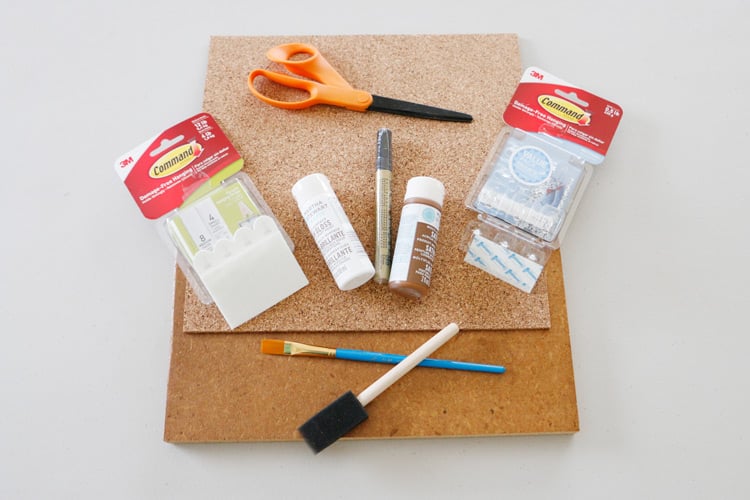 Supplies Needed:
- A piece of wood (we grabbed ours from our local restore for $1)
- A piece of cork board
- Command™ Mini Hooks
- Command™ Poster Strips
- Multi-surface paint (or paint pen)
- Scissors
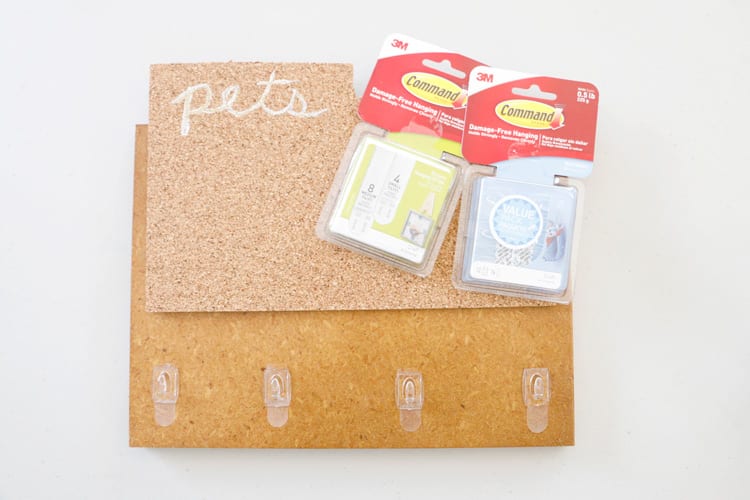
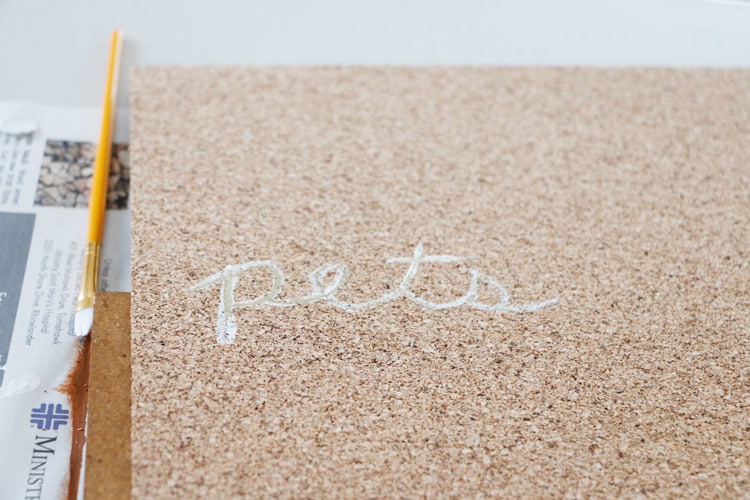 Start by painting pets about 3/4 of the way up the cork board. I painted it with white first, then wrote over it once it dried with gold paint.
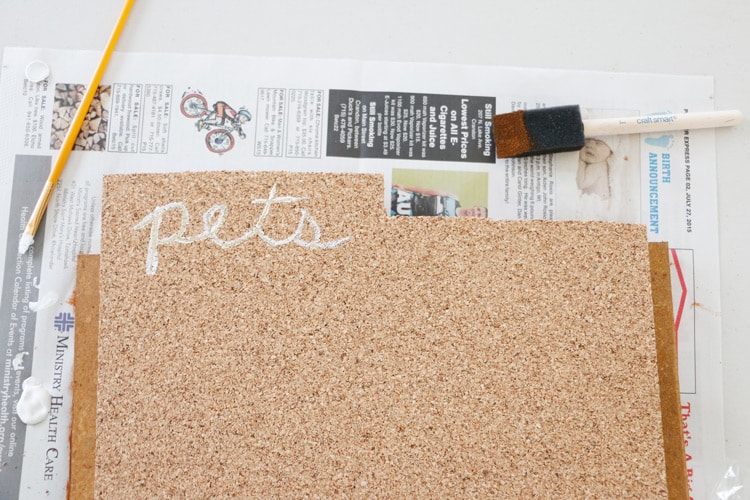
Trim around the word to create the mini rectangle that juts out from the cork board and then cut straight across.
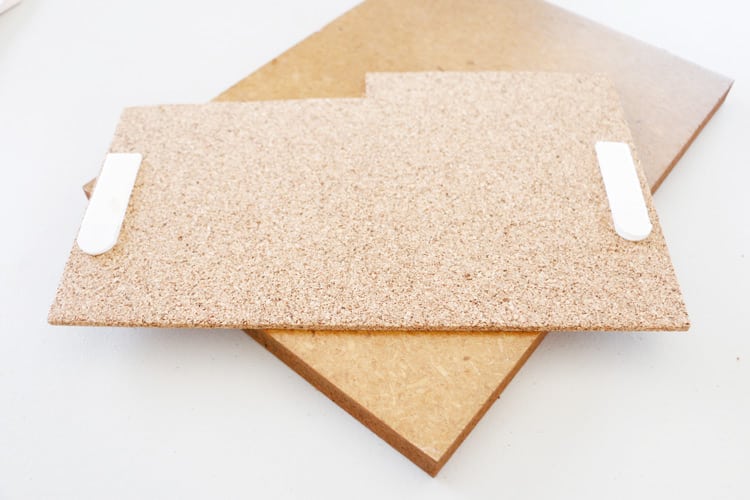 Use four of the Command™ Poster Strips and follow the instructions on the back of the box. Stick two together, remove one of the sides of backing, and place it on one side of the cork board. Repeat with the other side.
Peel off the other backing and stick to the piece of wood so that the cork board it sticking out about the wood. Press down firmly on both sides so it sticks to the wood and stays in place.
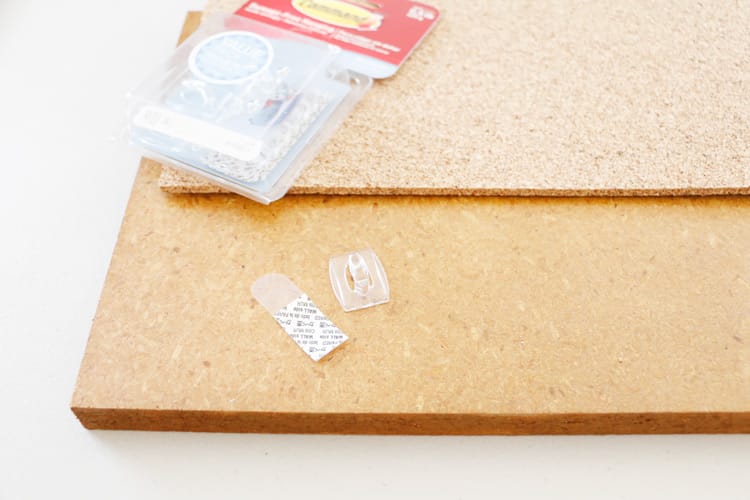
 For the Command™ Mini Hooks, follow the instructions on the box. Remove the backing, press to the wood for thirty seconds, remove the second backing, and press the hook down for thirty seconds. Repeat for the other four hooks.
Depending on the weight of your wood, you may be able to hang it on the wall with other Scotch® Brand and Command™ products. Ours was a bit heavier so we opted for some D-Ring hangers.
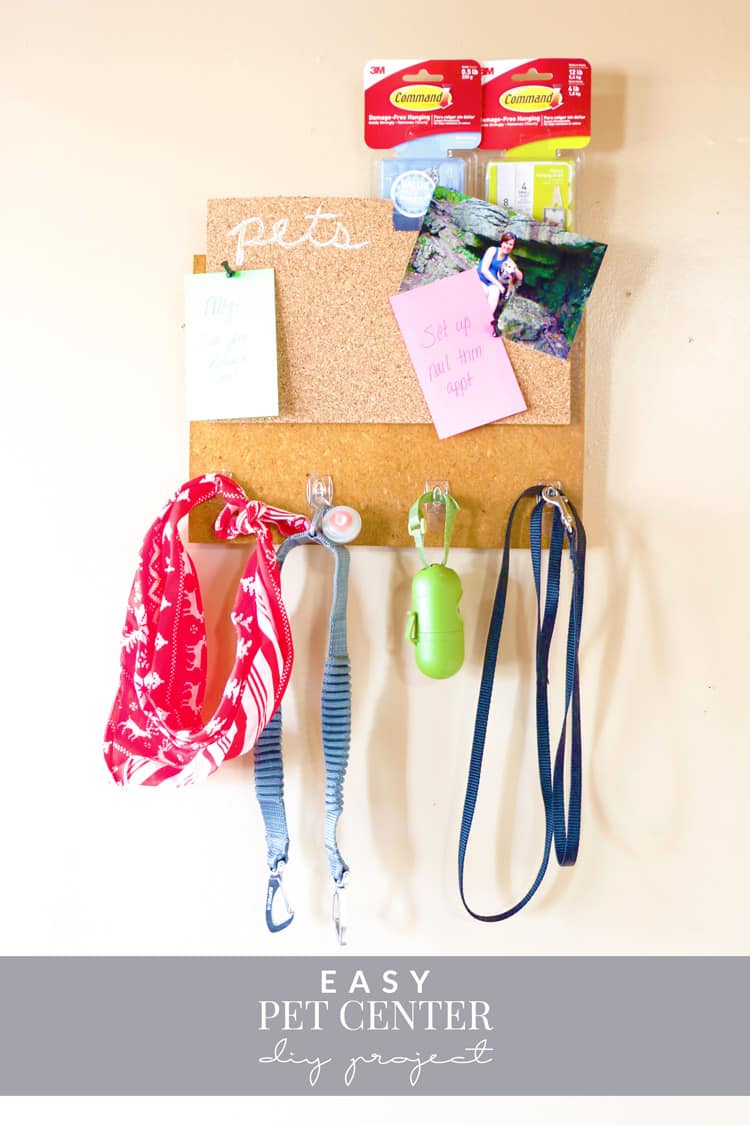 Hang your leashes and other pet accessories, pin reminders or photos to your cork board and you’re all set!
Want to grab some Command™ products of your own? Head to Walmart! You no longer have to search in hardware for these fantastic products – both Scotch® Brand and Command™ products are now available in the Craft aisle at Walmart! Command™ Brand provides damage-free hanging solutions for a wide variety of uses for your craft projects. Whether you’re making this awesome pet center DIY or another fun craft, the Command™ Brand has great options for hanging.
 If you’re looking for more project inspiration, be sure to check out the 3M Project Amazing website for some fantastic ideas!